In this section we will talk about this following topics:
- Story’s Title
- Layout
- Ordering slides
- Background
- Add photo to the story
- Write text
We start at the working area for composing my story:
Story’s Title
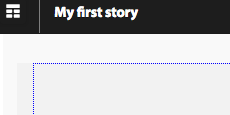
First thing you will do it to write the title of your story. This will be done write changing the text on the up-left side of the screen.
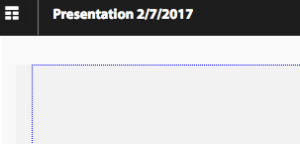
At first you will notice the default title with the day when this story was created. In this case it reads: Presentation 2/7/2017
Then I locate my mouse about the words: Presentation 2/7/2017 and make a click, allowing me to change the text.
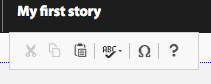
In this case we wrote the title: “My first story“, and it finalizes as this:
Layout
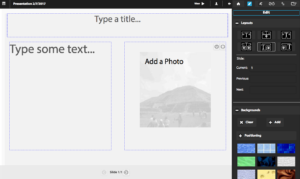
Notice this menu at the top-right hand side of the screen, and assure the menu of the pencil is selected.

You will see on the column on the right, as the first section you see on the column entitled Edit are the different options available to change the background of the page you are using for your story.
T means text, and the flowers means that you can add a photo/picture
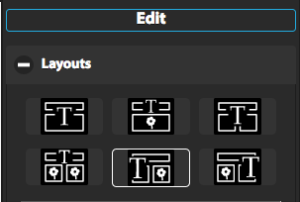
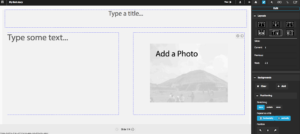
You can select which type of layout you can use on this particular page. In this example it is selected the second option form the second row, that is there will be text on the title and on the first half of the page, and on the second half of the page will be a photo.
Ordering slides
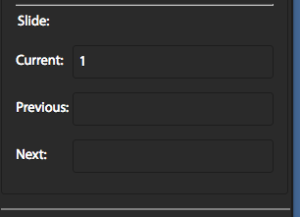
The next section on the edit area is the order of the slides. This is particular important is you are doing branching stories as it indicates clearly what pages goes first and which one follows.
You can read more about this section on the “storyline” instructions page.
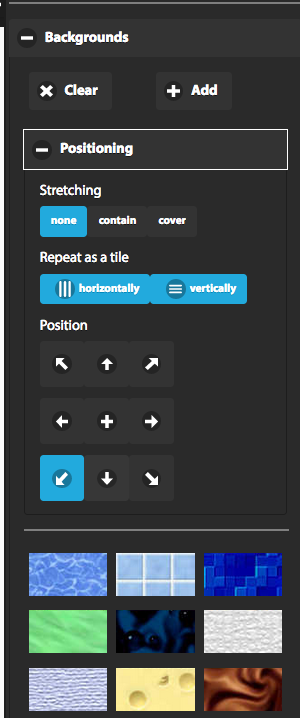
Background
The following section it refers to the background of the page. You can select one of the provided “photos” from the system.
As soon as you select one photo, it will showed up on your page and you will decide if you want this photo to stretch across all the page, or if you want the photos to be repeated horizontally or vertically.
Also the menu allows to decide if you want the photo to be anchored on the middle of the page or on a particular page’s edge.
You can also clear the background, and add a new photo or image for your background.
Play with the different possibilities so you can get familiar with it.
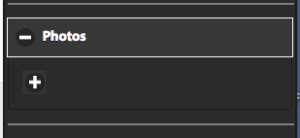
Add photo to the story
You can add a photo either for your background or to the current page of your book by utilizing this button:
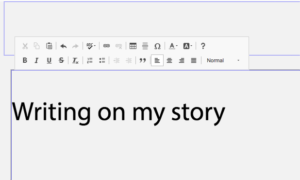
Write text
You only have to locate your self on the text areas and start writing. There will be shown a menu with different possibilities to support you on your writing.